RTMP Live Streaming
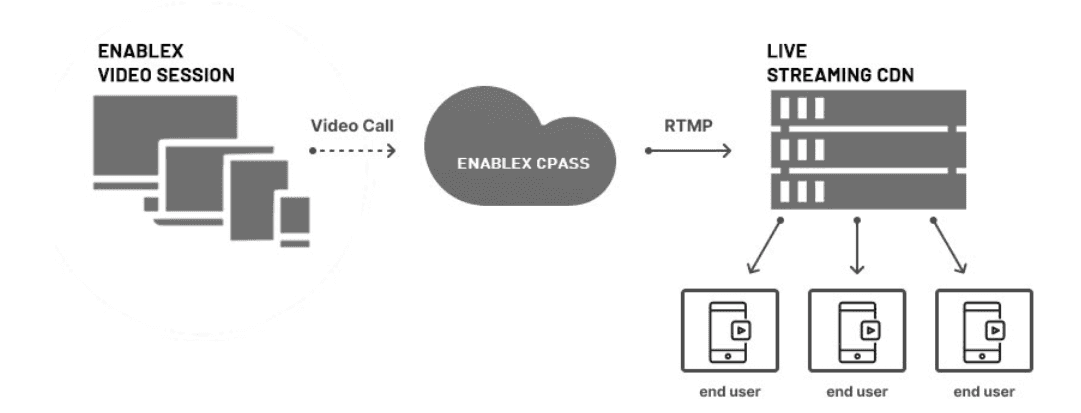
RTMP (Real-Time Messaging Protocol) lets you forward an ongoing EnableX video session as a single live stream to any CDN or platform that accepts an RTMP ingest — YouTube, Facebook, Vimeo, Twitch, LinkedIn Live, or a private media server.
EnableX composites all participant streams into a single video feed using a configurable streaming view, then pushes that feed over RTMP to the CDN of your choice. The CDN distributes the stream to your audience via its own infrastructure.
Participants join an EnableX video session from their own devices. EnableX takes the session and renders it through a streaming view — a web application that joins the room silently and presents the session layout you want your audience to see. That rendered view is encoded and pushed as a single RTMP stream to your CDN. The CDN then delivers the stream to viewers on the public URL it provides.
Step 1 — Get Your CDN Streaming Credentials
Before starting RTMP streaming from EnableX, set up a live stream on your chosen CDN platform. Every CDN provides three pieces of information you will need:
- RTMP Streaming URL — the ingest endpoint EnableX pushes the stream to.
- Streaming Key — authenticates your stream with the CDN.
- Public URL — the viewer-facing URL to share with your audience.
Concatenate the RTMP Streaming URL and Streaming Key when passing them to the EnableX API:
RTMP_URL/STREAMING_KEY.
Step 2 — Start and Stop Streaming
Use room.startStreaming() from the moderator's session to initiate the RTMP stream.
Pass the CDN ingest URL, your streaming key, and optionally a custom streaming view URL.
var streamingConfig = {
  rtmpDetails: {
    rtmpUrl: "RTMP_URL/STREAMING_KEY"
  },
  urlDetails: {
    url: "https://your-domain/streaming-view/?token="
    // Omit urlDetails to use the EnableX default view
  }
};

// Start streaming
room.startStreaming(streamingConfig, function(resp) {
  if (resp.status.resultCode === 0) {
    console.log("Streaming started — you are live.");
  } else {
    console.error(resp.status.error.errorDesc);
  }
});

// Stop streaming
room.stopStreaming(function(resp) {
  console.log("Streaming stopped.");
});

// All participants are notified when streaming starts
room.addEventListener("streaming-started", function(event) {
  console.log("Stream started by:", event.message.startedBy);
});

// All participants are notified when streaming stops
room.addEventListener("streaming-stopped", function(event) {
  console.log("Stream stopped by:", event.message.stoppedBy);
});?token=. EnableX appends the token at runtime. If you omit urlDetails
entirely, EnableX uses its default streaming view.
Step 3 — Monitor the Stream
Once streaming starts from your EnableX application, log in to your CDN account dashboard to monitor the incoming feed. Expect a lag of 10–40 seconds between the live session and the viewer-facing stream — this is normal for RTMP ingest pipelines.
For scheduled streaming events, your CDN may require you to click a separate Go Live button before the stream becomes visible on the public URL. Check your CDN provider's dashboard for this step.
The steps below use YouTube Live as an example. The same concepts — obtaining an RTMP ingest URL, a streaming key, and a public viewer URL — apply to any RTMP-compatible CDN.
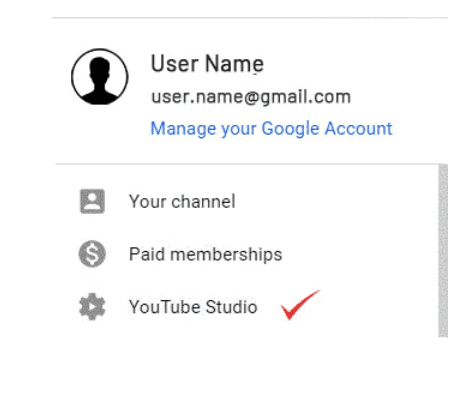
1. Navigate to YouTube Studio
Log in to YouTube. Click your profile icon in the top-right corner, then select YouTube Studio.
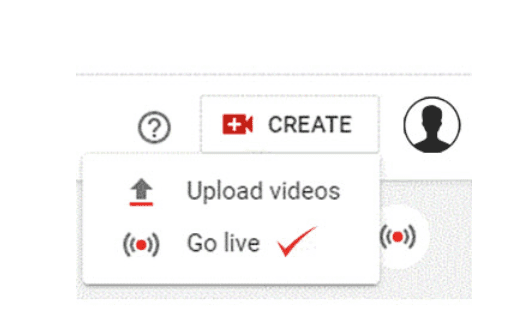
2. Create a Live Stream
In the top-right bar of YouTube Studio, click CREATE, then click Go live.
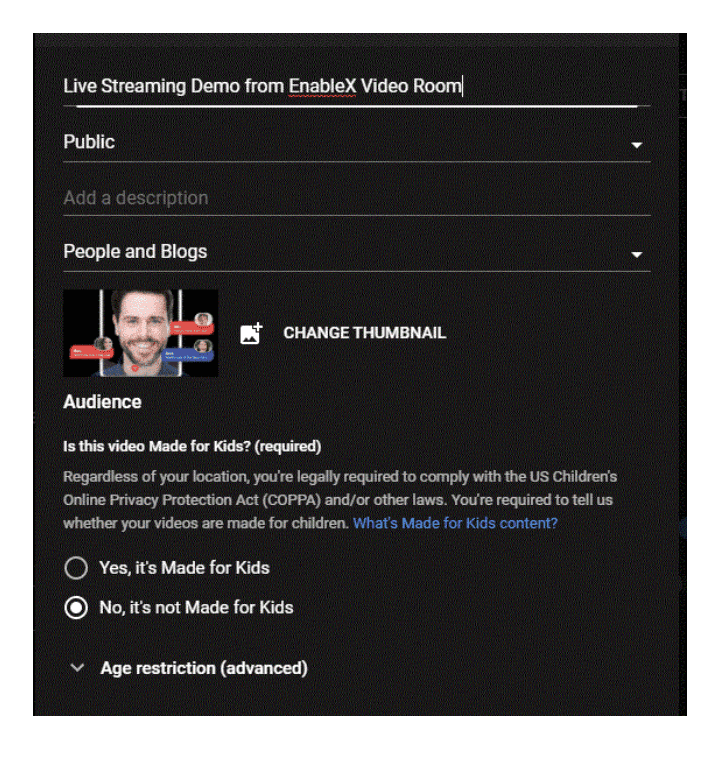
3. Configure the Stream
From the right-side panel, select STREAM. Fill in the stream details — title, description, and category. For a general video conference, People & Blogs is a suitable category.
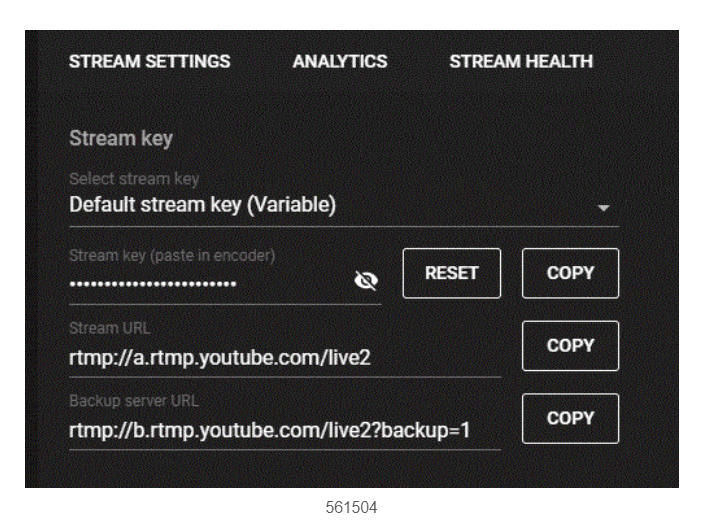
4. Obtain Stream URL and Key
After saving the stream configuration, YouTube displays the streaming console. Copy the
Stream URL and Stream Key — you will pass these to the
EnableX startStreaming() call.
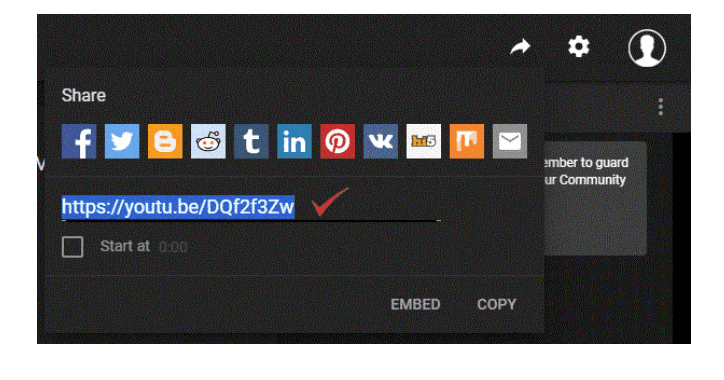
5. Get the Public Viewer URL
Click the Share (arrow) icon in the top-right of the streaming console. A popup displays the public URL for your audience. Copy and distribute this URL before going live.
By default, EnableX uses its built-in streaming view to composite the session before pushing
it to the RTMP CDN. If you need a branded layout, a specific participant arrangement, or
a completely custom UI, you can build and host your own streaming view and pass its URL to
startStreaming().
The custom streaming view is the same web application used by HLS Streaming and Live Recording — it is managed as a shared Virtual Agent for the session. The agent is started by whichever service activates first and runs until the last service ends.
For full details on how the Virtual Agent works and how to build a custom view, see Virtual Agent — Custom Streaming View.
RTMP streaming is controlled through the Video SDK. The method names and event signatures differ slightly across platforms — refer to the relevant SDK page for implementation details: